Author: admin

  • Edwardian Upholstery: Traditional or Modern Techniques?

    As I plan my first upholstery project—an Edwardian settee—I found myself wondering whether I should restore it as faithfully as possible using traditional upholstery techniques or take advantage of the comfort and convenience offered by modern materials. There seemed to be good arguments for both approaches. On one hand I loved the idea of replicating the techniques they would have used on the original piece. On the other I am a complete beginner and this is going to be a big enough challenge as it is!

    However, that dilemma did send me down a rabbit hole into the world of upholstery, and it got me thinking about the advantages and drawbacks of traditional versus modern restoration methods.

    The Foundation: Webbing

    Like most traditionally upholstered furniture, Edwardian settees were built from the frame upwards. One of the first layers applied to the wooden frame was jute webbing.

    Strong woven strips were stretched tightly across the seat frame and secured with upholstery tacks. The webbing formed the foundation of the seat and provided support for all the layers that followed.

    It appears that it is not unusual to find original webbing intact decades later!

    Hand-Tied Springs

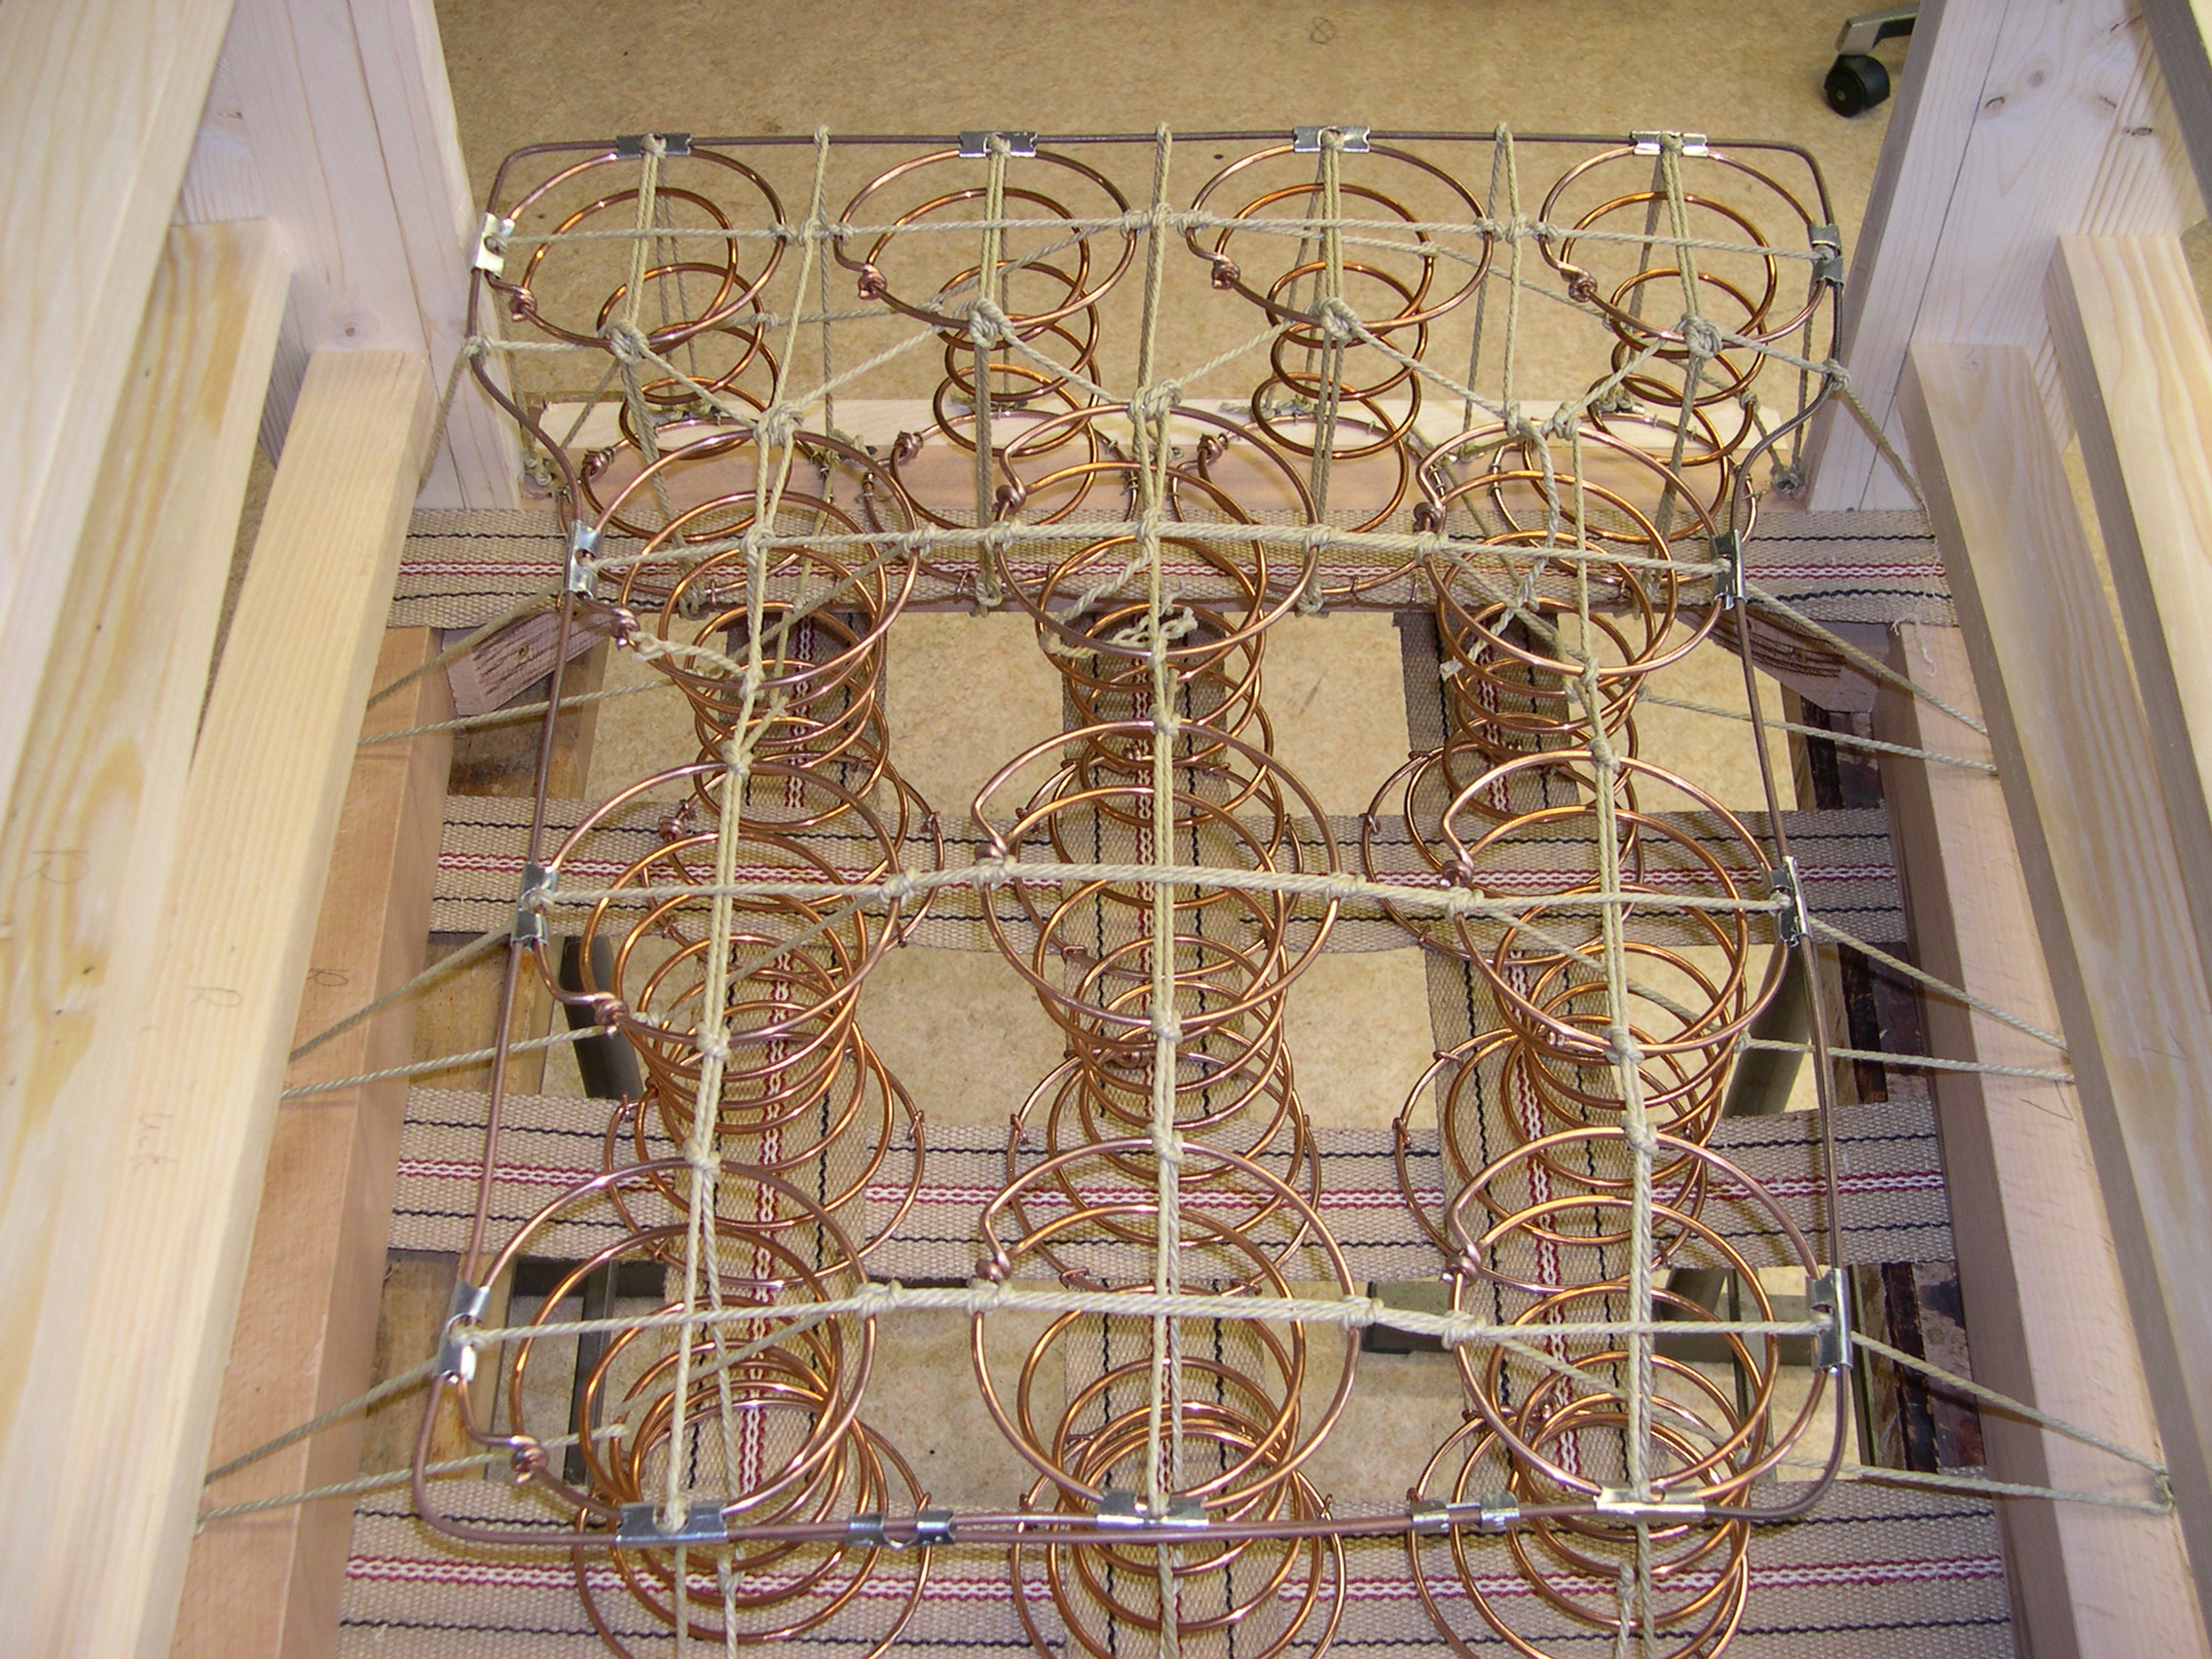
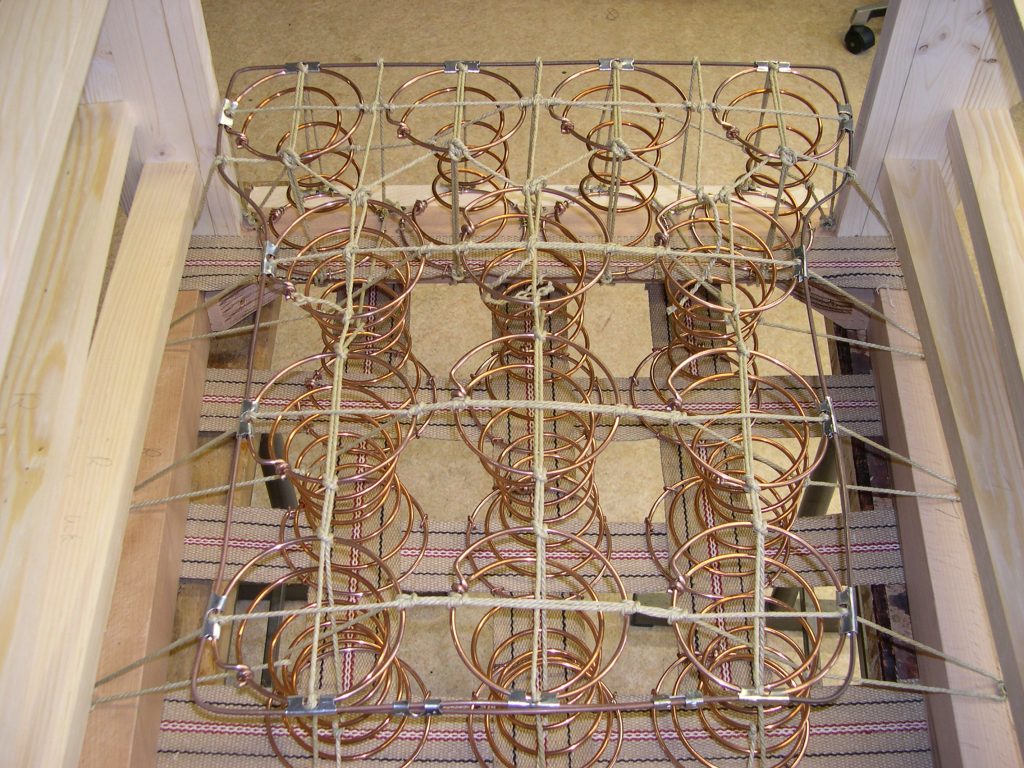
    On top of the webbing sat the coil springs, which were attached and then hand-tied using twine.

    This is one of the most recognised skills in traditional upholstery. Each spring was tied to neighbouring springs in multiple directions, helping distribute weight evenly across the seat.

    The result was a supportive yet comfortable seat that could withstand years of daily use.
    Hessian and Stitching Techniques

    Once the springs were secured, they were covered with hessian—a rough, natural woven fabric.

    This layer gave the upholsterer a practical surface to work on and helped hold in all the stuffing that would be added later.

    One of the standout things about Edwardian upholstery is just how much of it was done by hand. Edge rolls, padding, and the shaping of the seat were all built up with stitching rather than pre-made parts.

    You never actually see these stitches in the finished piece, but they’re a big part of what gives Edwardian furniture its clean lines and refined, elegant shape.

    Horsehair: The Traditional Stuffing Material

    Probably the material most strongly linked with traditional upholstery is horsehair.

    Even though the name suggests otherwise, upholstery horsehair isn’t soft like human hair at all. It’s springy, tough, and incredibly long-lasting. It can be compressed and shaped, but it still springs back and holds its form over time.

    It was commonly used in seats, arms, and backs, helping furniture keep its shape for decades. One of the reasons restorers still value it today is that it can often be cleaned, sterilised, and reused even after many years inside a piece of furniture.

    Cotton and natural wadding

    To make things feel a bit softer, layers of cotton felt and wadding were usually added over the horsehair.

    These helped even out the surface and made the final upholstered piece more comfortable under the outer fabric. Unlike modern synthetic fillings, these natural fibres were breathable and worked together with the horsehair to create a seat that felt firm but still comfortable.

    Traditional Fabric Choices

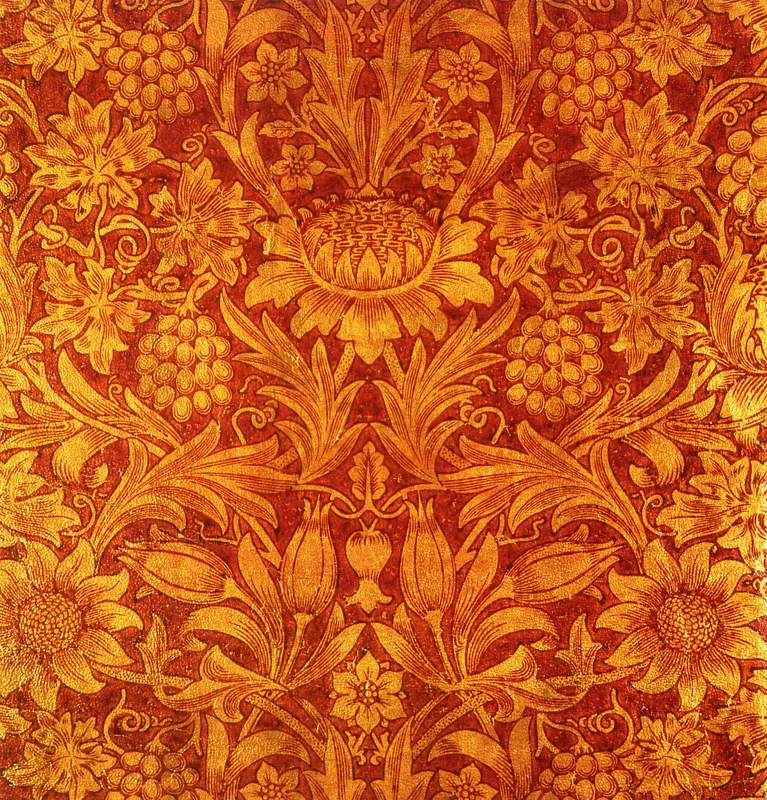
    Edwardian interiors were lighter and less ornate than Victorian ones, and the fabrics reflected that shift. Common choices included damasks, jacquards, velvets, brocades, and floral or striped weaves.

    Colours tended to be soft and muted—greens, golds, creams, blues, and gentle florals—though this varied depending on the home and how the furniture was used. A lot of Edwardian settees paired these fabrics with polished exposed wood, striking a balance between decoration and simplicity.
    Traditional vs Modern Upholstery

    Upholstery methods have evolved over generations, and both traditional and modern approaches have their place.

    Traditional restoration is valued for its authenticity, craftsmanship, and longevity. It preserves the original character of the piece, but it can be time-consuming, costly, and materials aren’t always easy to source. It also tends to feel firmer than what many people expect today.

    Modern upholstery, on the other hand, is usually more affordable and quicker to complete. It often offers greater comfort, more fabric options, and easier maintenance. However, it can sometimes change the original look and feel of older furniture, and lower-quality materials may not last as long.

    In practice, many restorers use a mix of both—keeping traditional structure like springs and stitching, while adding modern cushioning for comfort.

    WQ Team
  • 4 Tips to Distinguish Between Solid Wood and Veneer!

    Have you ever looked at a table or dresser and wondered, “Is this actually solid wood?”

    Before we get into how to tell, let’s quickly explain what veneer actually is.

    What Is Veneer?

    Veneer is a thin layer of real wood that’s glued onto a core material like plywood, MDF, or another type of wood. It’s not fake, it is genuine wood it’s just not solid all the way through.

    Veneer has been used for centuries in fine furniture making, many antique pieces feature beautiful veneer work to showcase rare or decorative grain patterns.

    That said, veneer and solid wood behave differently — especially when it comes to refinishing and restoration.

    Here’s how to spot the difference.

    1. Check the Edges

    Look closely at the edge of a tabletop or drawer front.

    Solid wood will show continuous grain flowing naturally around the edge.

    Veneer may reveal a thin seam where the surface layer meets the material underneath. If you see what looks like a thin sheet applied on top, you’re likely looking at veneer.

    2. Look at the Grain

    Wood grain should look natural, non symmetrical and slightly varied.

    If the grain pattern looks perfectly mirrored or repeated across a wide surface, it’s often veneer.

    3. Inspect the Underside or Inside

    Turn the piece over or look inside drawers and cabinets.

    If the interior surface looks completely different from the outside, there’s a good chance the outer surface is veneered. Solid wood pieces are usually more consistent throughout.

    4. Watch for Lifting or Chips

    On older furniture, veneer sometimes shows small signs of lifting at corners or tiny chips that reveal a different material underneath. That exposed layer is the core beneath the veneer.

    Why It Matters

    The difference is important because veneer can only be sanded lightly. If you sand too aggressively, you can go right through it. Solid wood allows for more extensive refinishing and repair.

    That’s why it’s always a good idea to identify what you’re working with before starting any DIY project.

    If you’re unsure what you have, or if you have an antique piece that needs professional restoration then feel free to get in touch. We’re always happy to take a look and offer any help!

    WQ Team

  • Saving an Edwardian Settee One Step at a Time

    If you follow Wood Quirking, you may or may not know that I (Zoe) spend most of my time managing our social media, photographing / filming projects, editing videos, and helping with all the behind-the-scenes jobs to try and grow the business.

    However, I’ve decided it’s time to step out of my comfort zone and take on a challenge of my own.

    I’ve always admired the incredible transformations Dan and Nick achieve in the workshop, bringing tired and forgotten pieces of furniture back to life. I have never considered that this was something I could get involved with until I started considering learning the challenging art of upholstery.

    I knew that this learning journey had to start somewhere so I thought, why not start with a piece of furniture that had been all but given up on. Although I am admittedly overwhelmed by how much work this piece of furniture needs, I also see an opportunity to learn a completely new skill and challenge myself in a way I never have before.

    So, Dan and Nick very kindly went to get it and bring it back to the workshop!

    Behold! The Edwardian Window Seat! 🪑😍

    And now comes the fun part!

    My plan is to completely strip the settee back to its frame and rebuild it from the ground up. Every layer will need to come off so I can see exactly what’s hiding underneath and understand how it was originally constructed.

    From there, I’ll be assessing what needs replacing, my thinking at this point is that it is likely to be everything that makes up the upholstery. The webbing, springs, stuffing, padding and, of course, a brand-new fabric!

    I am aware that this sounds incredibly ambitious for someone who has never done upholstery before!

    I won’t pretend I know exactly what I’m doing yet. There will almost certainly be mistakes along the way, plenty of moments where I’ll need to stop and figure things out, and probably a few occasions where I wonder what I’ve started.

    Thankfully, I won’t be tackling it alone.

    Dan and Nick will be on hand throughout the project to share their knowledge, offer advice, and help me when I inevitably get stuck. Having their support gives me the confidence to take on something that otherwise might have felt completely overwhelming.

    One of the things I love most about Wood Quirking is that there’s always something new and interesting to try! Every day is different.

    This Edwardian settee is definitely going to be a learning curve, but that’s exactly why I’m excited about it.

    Over the coming weeks and months, I’ll be sharing the entire process, from stripping it down and discovering what’s underneath to rebuilding it layer by layer and choosing the final fabric.

    I’m sure there will be successes, setbacks, and plenty of lessons learned along the way, but hopefully by the end of it all I’ll have transformed this neglected settee into something beautiful once again.

    Wish me luck—I think I’m going to need it!